Part 2 – SwiftUI Pinterest Layout: Optimized Algorithm

Introduction
In the previous blog, we explored how to use the new SwiftUI Layout protocol and walked through the two core functions that help us build complex custom layouts: sizeThatFits and placeSubviews. The Layout protocol allows for building sophisticated layout containers without using UIKit or workaround hacks.
In this second part, we’ll focus on improving our initial solution, especially around memory usage and algorithmic efficiency. Our first approach in Part 1 relied on simply appending to an array. If you have a large dataset, the previous solution will become inefficient.
In this post, we’ll use adaptive logic to improve the implementation of sizeThatFits and placeSubviews, making the PinterestLayout robust enough for real-world use.
Let's refine our initializer
In the previous code, we define a number of columns as a static constant:
private static let numberOfColumns: Int = 2
This meant the layout always used two columns and was hardcoded at the type level. Now, we improve flexibility by injecting the number of columns through the initializer:
init(numberOfColumns: Int = 2, itemSpacing: CGFloat = 12) {
    self.numberOfColumns = numberOfColumns
    self.itemSpacing = itemSpacing
}
This change removes the static keyword and moves numberOfColumns to an instance-level property, making the layout configurable when you create it.
For example, you now easily write:
PinterestLayout(numberOfColums: 3)
This makes the layout more reusable and adaptive, allowing you to choose the number of columns depending on the context or screen size.
Let's dive deep into sizeThatFits
Let's revisit the function sizeThatFits. In the previous implementation, we had two arrays, leftSizeColumns and rightSizeColumns, where we tried to append the card's height. Then, we sum the total height for each array. At the final step, we extract the max height, then report the final size the container needs.
We can improve our code by only using one single array where its size is equal to the number of columns:
var columnHeights = [CGFloat](repeating: 0.0, count: numberOfColumns)
Here's how our updated code looks:
func sizeThatFits(proposal: ProposedViewSize, subviews: Subviews, cache: inout ()) -> CGSize {
    let safeProposalWidth = proposal.replacingUnspecifiedDimensions().width
    let cardWidth = (safeProposalWidth - itemSpacing) / CGFloat(numberOfColumns)
    var columnHeights = [CGFloat](repeating: 0.0, count: numberOfColumns)

    for subView in subviews {
        // 1
        let height = subView.sizeThatFits(.init(width: cardWidth, height: nil)).height
        // 2
        let columnIndex = columnHeights.enumerated().min(by: { $0.element < $1.element })!.offset

        // 3
        if columnHeights[columnIndex] > 0 {
            columnHeights[columnIndex] += itemSpacing
        }
        // 4
        columnHeights[columnIndex] += height
    }

    return CGSize(
        width: cardWidth * CGFloat(numberOfColumns) + itemSpacing,
        height: columnHeights.max() ?? .zero // 5
    )
}
- Determine the height of a subview based on its width..
- We distribute each card to the column that currently has the smallest total height, ensuring the grid remains balanced even when the cards have different sizes.
- If this column already contains cards, we add
itemSpacingto create a space between the existing cards and the new one, preventing them from stacking directly on top of each other. - Based on the
columnIndex, we add the subview’s height to the column. - We extract the maximum height among all columns because the tallest column determines how much total height the container needs to fit all its content.
Note: We use columnHeights.enumerated().min(by: { $0.element < $1.element })!.offset to always select the column with the current minimum height.
This ensures that each new card is strategically placed to maintain the overall balance of the layout, resulting in a consistent and visually appealing waterfall effect rather than simply cycling through columns linearly.
Let's dive deep into placeSubViews
In this section, we will use the same algorithm as we did with sizeThatFits
But this time, instead of tracking the height, we will use it to track the y position, which is calculated based on the height plus the spacing:
We use the yOffset to keep track of the y position per column:
var yOffset = [CGFloat](
    repeating: bounds.minY + itemSpacing,
    count: numberOfColumns
)
Here's how our updated code looks:
func placeSubviews(in bounds: CGRect, proposal: ProposedViewSize, subviews: Subviews, cache: inout ()) {
    let safeProposalWidth = proposal.replacingUnspecifiedDimensions().width
    let cardWidth = (safeProposalWidth - itemSpacing) / CGFloat(numberOfColumns)
    var yOffset = [CGFloat](repeating: bounds.minY, count: numberOfColumns)

    for subView in subviews {
        // 1
        let columnIndex = yOffset.enumerated().min(by: { $0.element < $1.element })!.offset
        // 2
        let x = bounds.minX + (cardWidth + itemSpacing) * CGFloat(columnIndex)

        let height = subView.sizeThatFits(.init(width: cardWidth, height: nil)).height
        let y = yOffset[columnIndex]

        // 3
        subView.place(
            at: CGPoint(x: x, y: y),
            proposal: ProposedViewSize(width: cardWidth, height: height)
        )

        // 4
        yOffset[columnIndex] += height + itemSpacing
    }
}
- We distribute each card to the column that currently has the smallest total height, ensuring the grid remains balanced even when the cards have different sizes.
- We calculate the x position by multiplying the column index by the card width + spacing.
- We place the subview at the calculated
(x, y)position, giving it the correct width and measured height. - We update the
yOffsetfor the current column by adding the height plus spacing, so the following item stacks below.
Comparing Modulo-Based vs Optimized Layout
To better understand the impact of the algorithmic improvement, here's a side-by-side comparison:
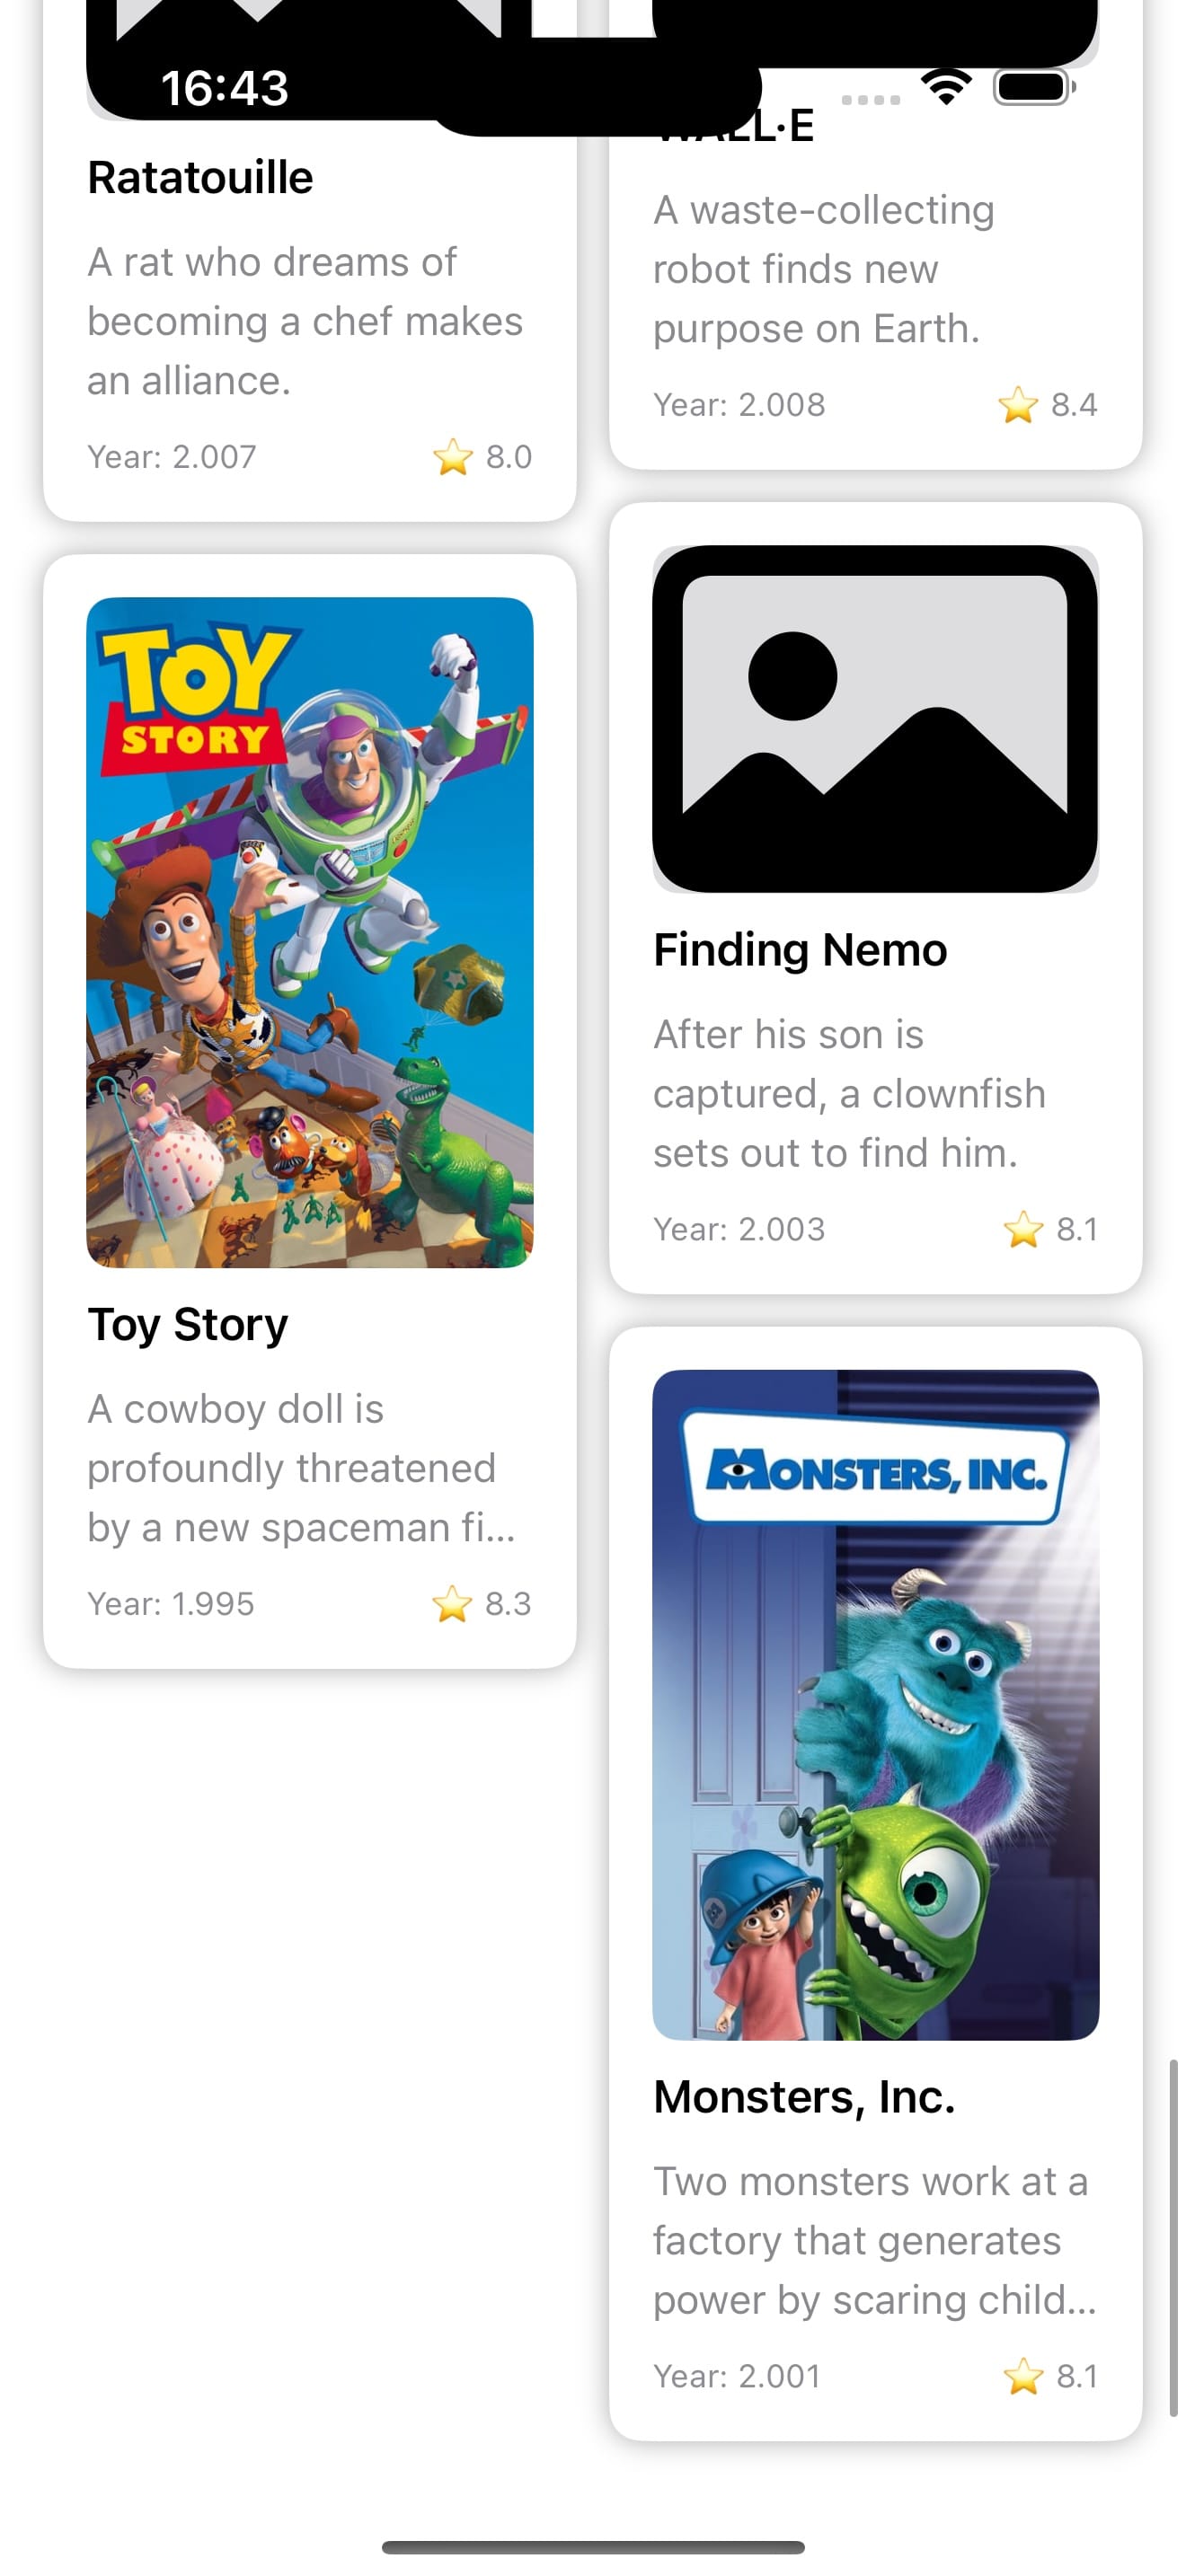
Modulo-based layout
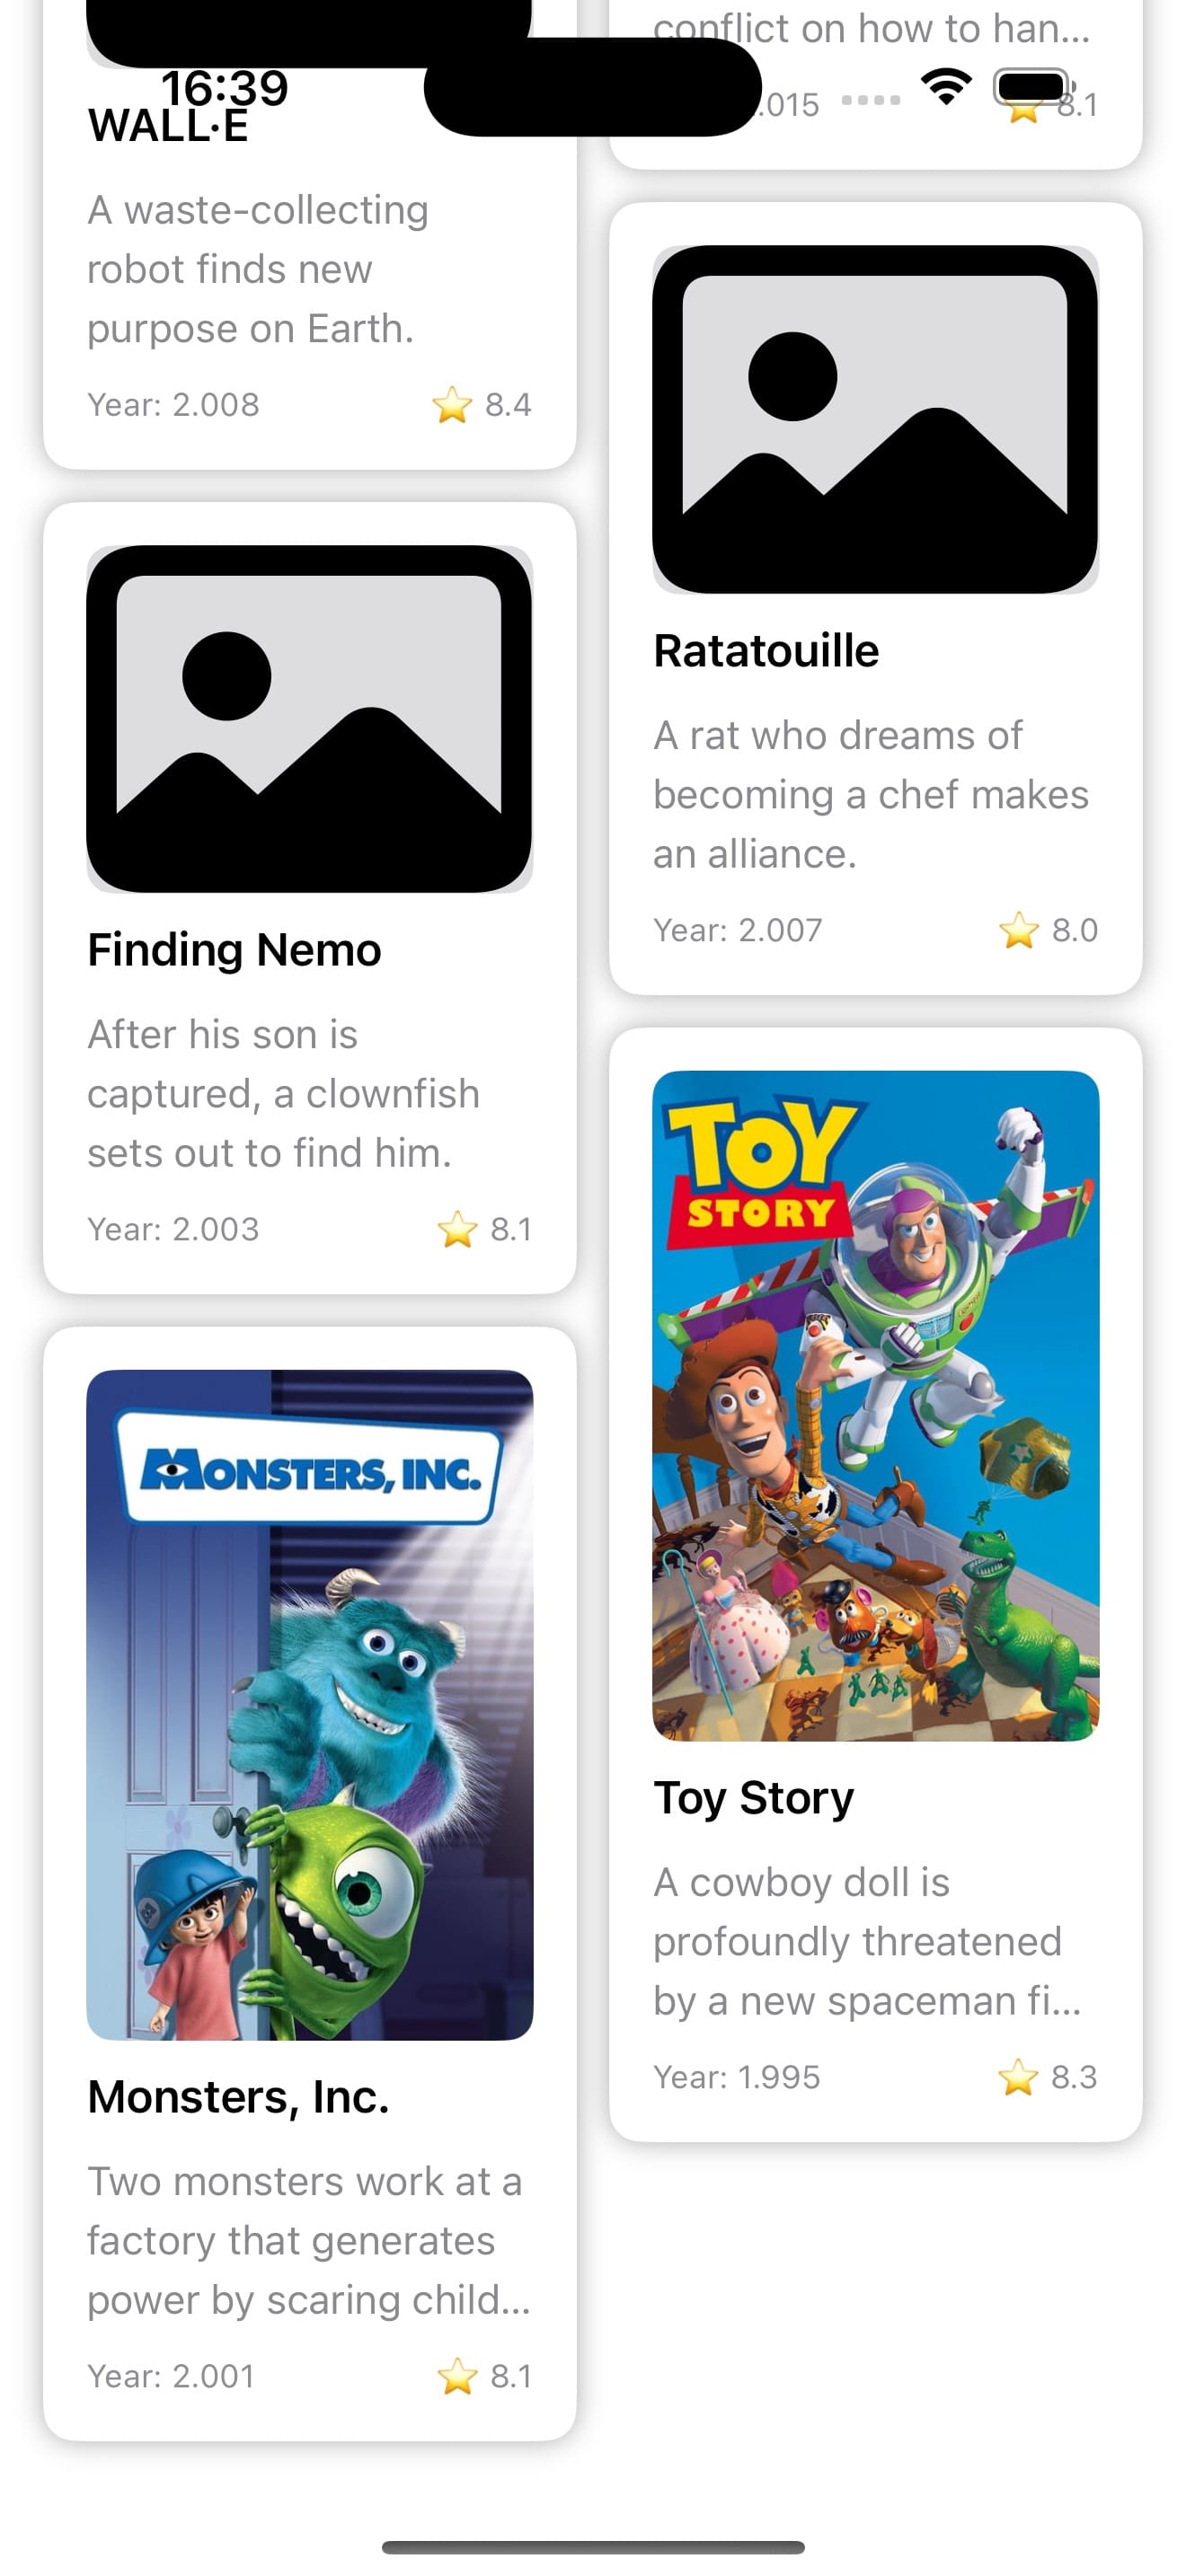
Optimized height-balancing layout
This comparison illustrates how the optimized version distributes views more effectively by consistently selecting the shortest column, rather than simply cycling through columns using modulo.
Summary
In this second part, we refined our SwiftUI custom layout by making it more adaptive and configurable. Instead of hardcoding the number of columns or using a basic modulo-based distribution, we now:
- Introduce a dynamic numberOfColumns initializer for flexible reuse.
- Use a single
columnHeightsarray insizeThatFitsto track each column’s height and determine the container’s required size. - Place each subview in the column with the least total height, producing a more balanced and Pinterest-like layout.
While the solution offers a better structure and a more natural appearance, it’s not yet optimized for large datasets. Future improvements will focus on enhancing performance and memory handling; stay tuned for Part 3.
Source Code: View the final solution on GitHub
References & Resources
Here are some valuable resources that helped guide the design and implementation: